Have you ever faced a situation wherein formatted your external hard drive, and as a result of it lost your precious files? If so, no need to worry..! There is 100% chances of successful recovery, unless and untill you have not written any new files on the formatted drive. So, if you really want to recover files from formatted external hard drive, immediately stop using the drive after you have formatted. If the drive is overwritten with new files, chances of formatted files recovery is very less. Before going on to the recovery solution, let's understand what happens when you format an external hard drive.
What happens when you format an external hard drive?
When a drive is formatted, the file system information, which tells the operating system how to locate and access files, is typically removed or overwritten. However, the actual data on the drive is not immediately erased. Instead, the space previously occupied by the files is marked as available for new data to be written. Until new data is written over the old data, the original files are still recoverable. However, before going on how to restore files from formatted external hard drive, let's have a quick look at the scenarios wherein we usually format our external drive.
Scenarios wherein we usually format external hard drive
Accidental Formatting: All files are deleted from external hard drive after successful format. When users accidentally format a partition of external hard drive instead of systems internal hard drive partition then he loses all important files from that partition. This incident usually happens during new installation of operating system.
Virus Attack: Virus attack is one of the common scenarios which force user to format external hard drive. When system is connected to infected storage device then virus may get into the external hard drive and may corrupt the entire hard drive. In some cases malware program affects the MBR (Master Boot Program) and hence hard drive become inaccessible. In such situations, you may not get access to your external hard drive and you may face format error message. Until and unless you format the drive, you won't be able to access your hard drive.
File System Corruption: File system is used to access different files or data stored in a external hard drive or any storage device. If the file system of hard drive is corrupted then user is unable to access the files or folder saved in a hard disk. You can restore your external hard drive using Formatted Hard Drive Recovery tool.
Bad Sector: It is a cluster of space on hard drive which appears to be defective. Due to presence of excessive bad sectors on hard drive, it may result in the corruption of the hard drive. As a result, you may face format error message whenever you try to access your external hard drive.
You can use this tool to restore files from formatted external hard drive within short time interval. You can follow few simple steps for formatted external hard drive recovery. With the help of this easy to use tool, you can also recover data from Windows 10 system drive after Upgrade.
File Restore Software to Recover files from formatted external hard drive
- File Restore Software is compatible in recovering files on Windows and Mac operating systems (All the versions).
- It recovers different file types such as images, songs, videos, documents, etc.
- Software is compatible with different file system such as FAT 16, FAT 32, NTFS, HFS, HFSX, HFS+, etc.
- Preview option is available which allows user to view recovered hard drive before save it on any storage device.
- File Restore software has an extra ordinary feature called Save Recovery Session which allows user to save recovery time.
- File Restore tool is effective in recovering files from Seagate Backup Plus, Western digital, SanDisk, Samsung, Iomega, Buffalo, Toshiba, and other popular brands of external hard drive.
Steps to restore files from formatted external hard drive
Step 1: Download and install the File Restore Software on your computer. Launch the software, and Select the folder or the drive from where you to recover deleted files. Once you have selected the drive click on the Scan button to start the scanning process.
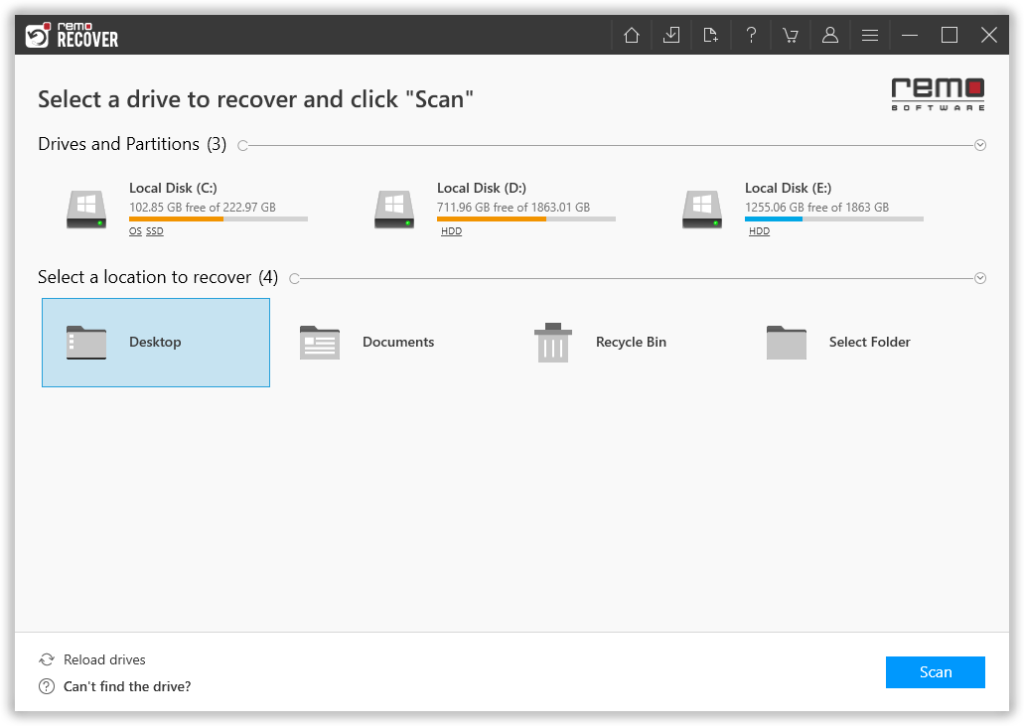
Figure 1: Main Window
Step 2: When the tool is done with the quick scan, Run the Deep Scan option. While the tool is doing its job. You can make use of the Dynamic Recovery View option to have a look at the recovered files.
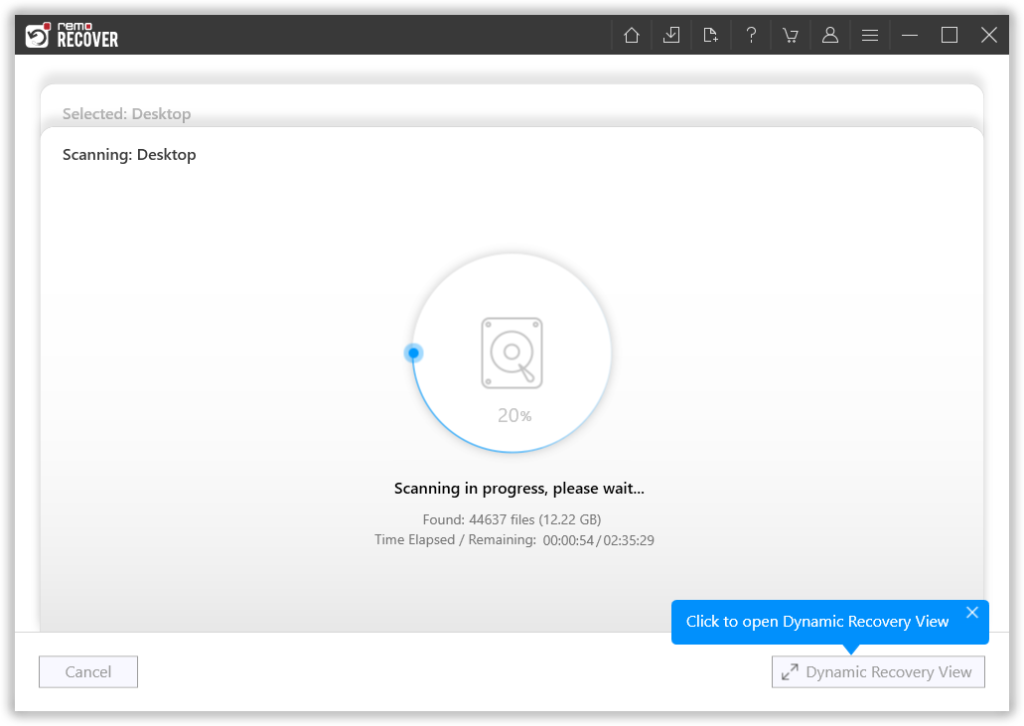
Figure 2: Scanning in Progress
Step 3: Use the Advanced Filter option to easily find the files that you want.
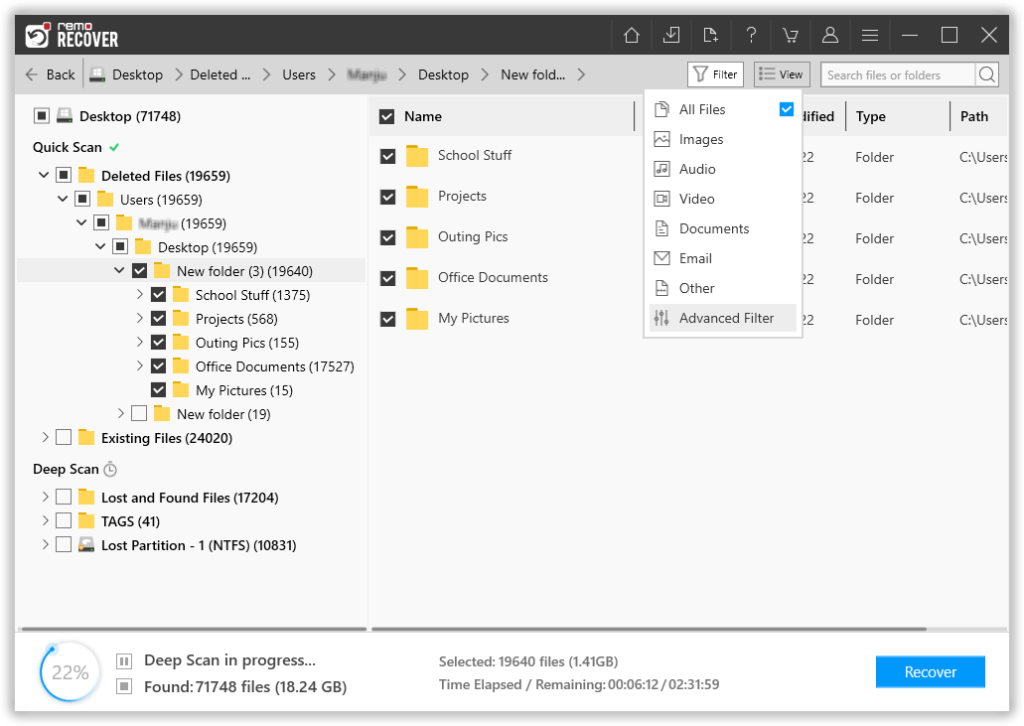
Figure 3: Recovered Files
Step 4: Double-click on any file to preview it.
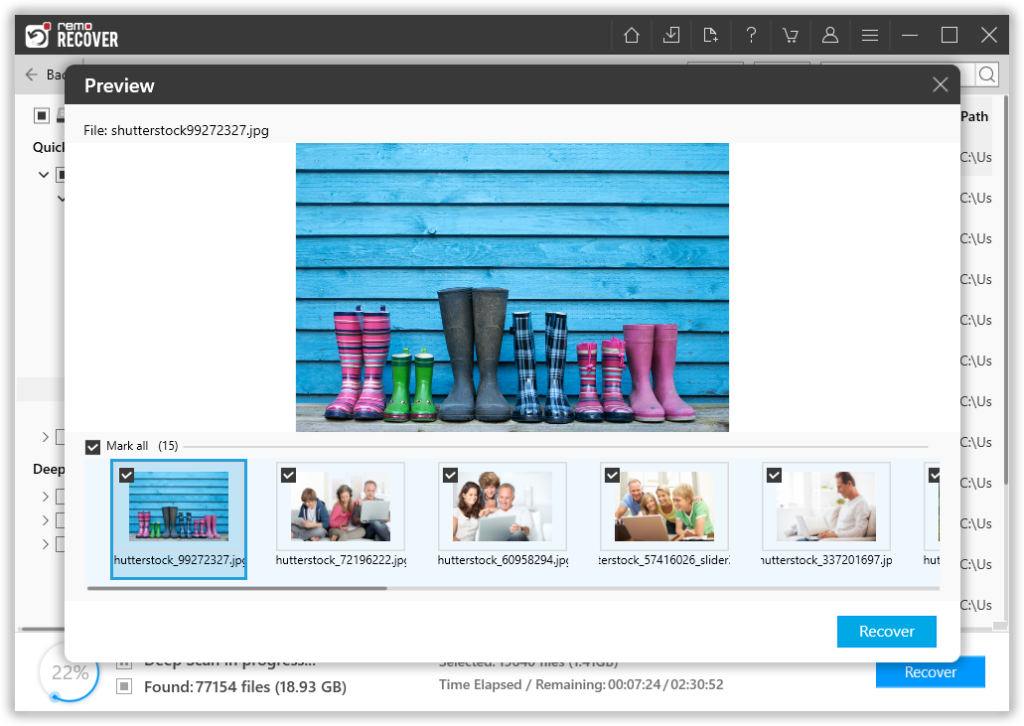
Figure 4: Preview File
Step 5: Finally, select and save the required files at the location of your choice
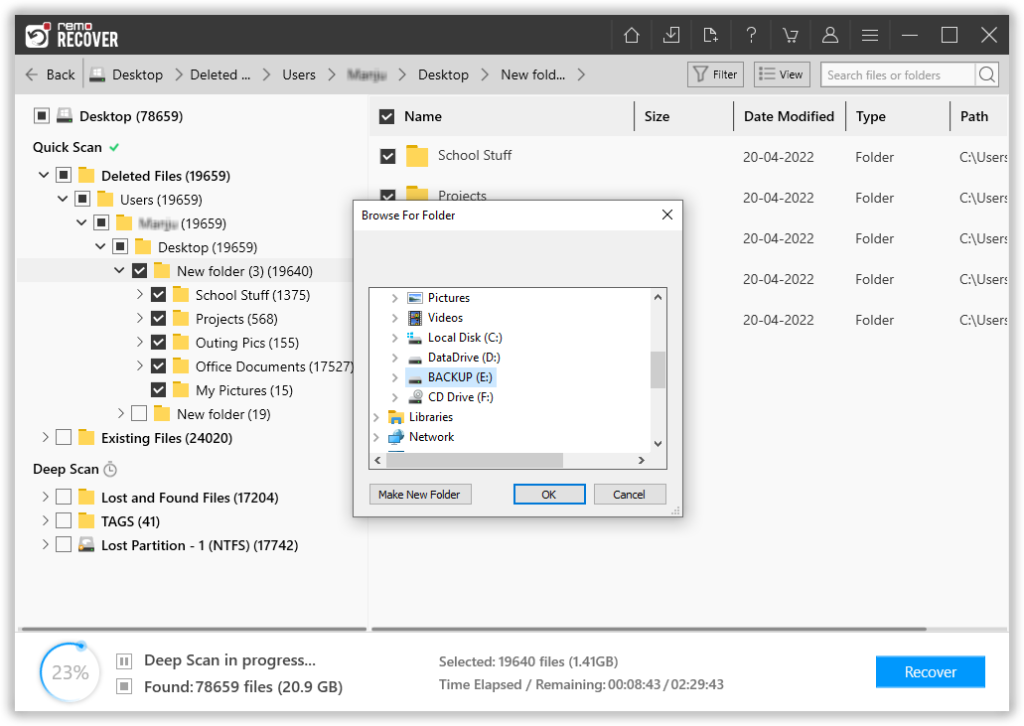
Figure 5: Save Recovered Files